Friday, March 21, 2014

It's been awhile....

I can't believe it's been almost a year since my last post. I have to admit I got lazy and the idea of blogging seem more of a chore than a hobby. As I was watching Project Runway: Under the Gunn last night; I realized something. I noticed how hard these people are trying to reach their dreams and here I am sitting at home doing nothing but hoping my dream would somehow land in my hands. 

Over the year, I kept up with fashion/beauty news but I dropped my goal somewhere along the way. I reflected a lot this past month and decided that I'm going back to find that dream I dropped. I'm going to keep persuading my dream job and hope that I can get a career out of it. If not, I can express my passion here on this platform.

On a brighter note, spring is finally here. We are seeing a lot of pastel and floral in our spring wardrobe. Mixing textures and prints is a good way to start. Graphic tees and men's wear inspired pieces are good to add in your closet as well. 

I was inspired by the floral prints and how delicate they are. I pulled together a quick casual look with floral prints. You can definitely dress it down by throwing on a graphic tee or denim shirt to balance out the feminine look. If you want to learn more about how to wear your floral prints, click here.

 
Floral Spring


Tuesday, April 23, 2013

Zoya's Polish Exchange

Zoya is back with their nail polish exchange again for Earth Day. All polishes are at $4/bottle except for pixie dust. What a great deal! Minimum of 6 bottles and no more than 24 bottles; so I would suggest you gather a few friends and combine the order since free shipping starts at $55.

This is a great way to do some spring cleaning for your nail polishes and send the ones that you don't use back to Zoya for proper disposal of your "paint". I have a few that I don't use and even an OPI one that I can't even open the bottle anymore. *sadface*

You have 3 more days to get your hands on these 5Free long wearing polish. I know that Butter London emphasis on their 3Free polishes but Zoya is 5Free!


I did this 2 years ago and I picked the following colors:


Yummy-  Super pretty opaque baby blue. One of my favorite!


Sunny- More of a orange with a copper shimmer than the pink shown on their website


Jules- Neutral shimmery champagne with gold and silver sparkles.


     Addison- A subtle rose pink with a hint of shimmer.


I picked up 4 more Zoya polishes this time and I'll share it with you guys when I receive my shipment. Yay Super excited for my new polishes and finally getting rid of some old dried up ones!


Sunday, April 21, 2013

Sephora Earth Day Promo


Like last year, Sephora will have their Earth Day promotion tomorrow for a free full size moisturizer from Origins when you bring in an empty beauty container or bottle for trade in. You can choose between "Starting Over" or "A Perfect World" moisturizer. Ofcourse like any other promotions, this is only available while supplies last so be sure to go ASAP. =)

 If you can't make it in store, you can always use the promo code below to get it with the rest of your order during check out. As a reminder, tomorrow is the last day for VIB members to receive 15% off during Chic Week.  Let's recycle and make the world a beautiful place.

Wednesday, April 17, 2013

Sephora Haul & Chic Week

Happy Hump Day!!

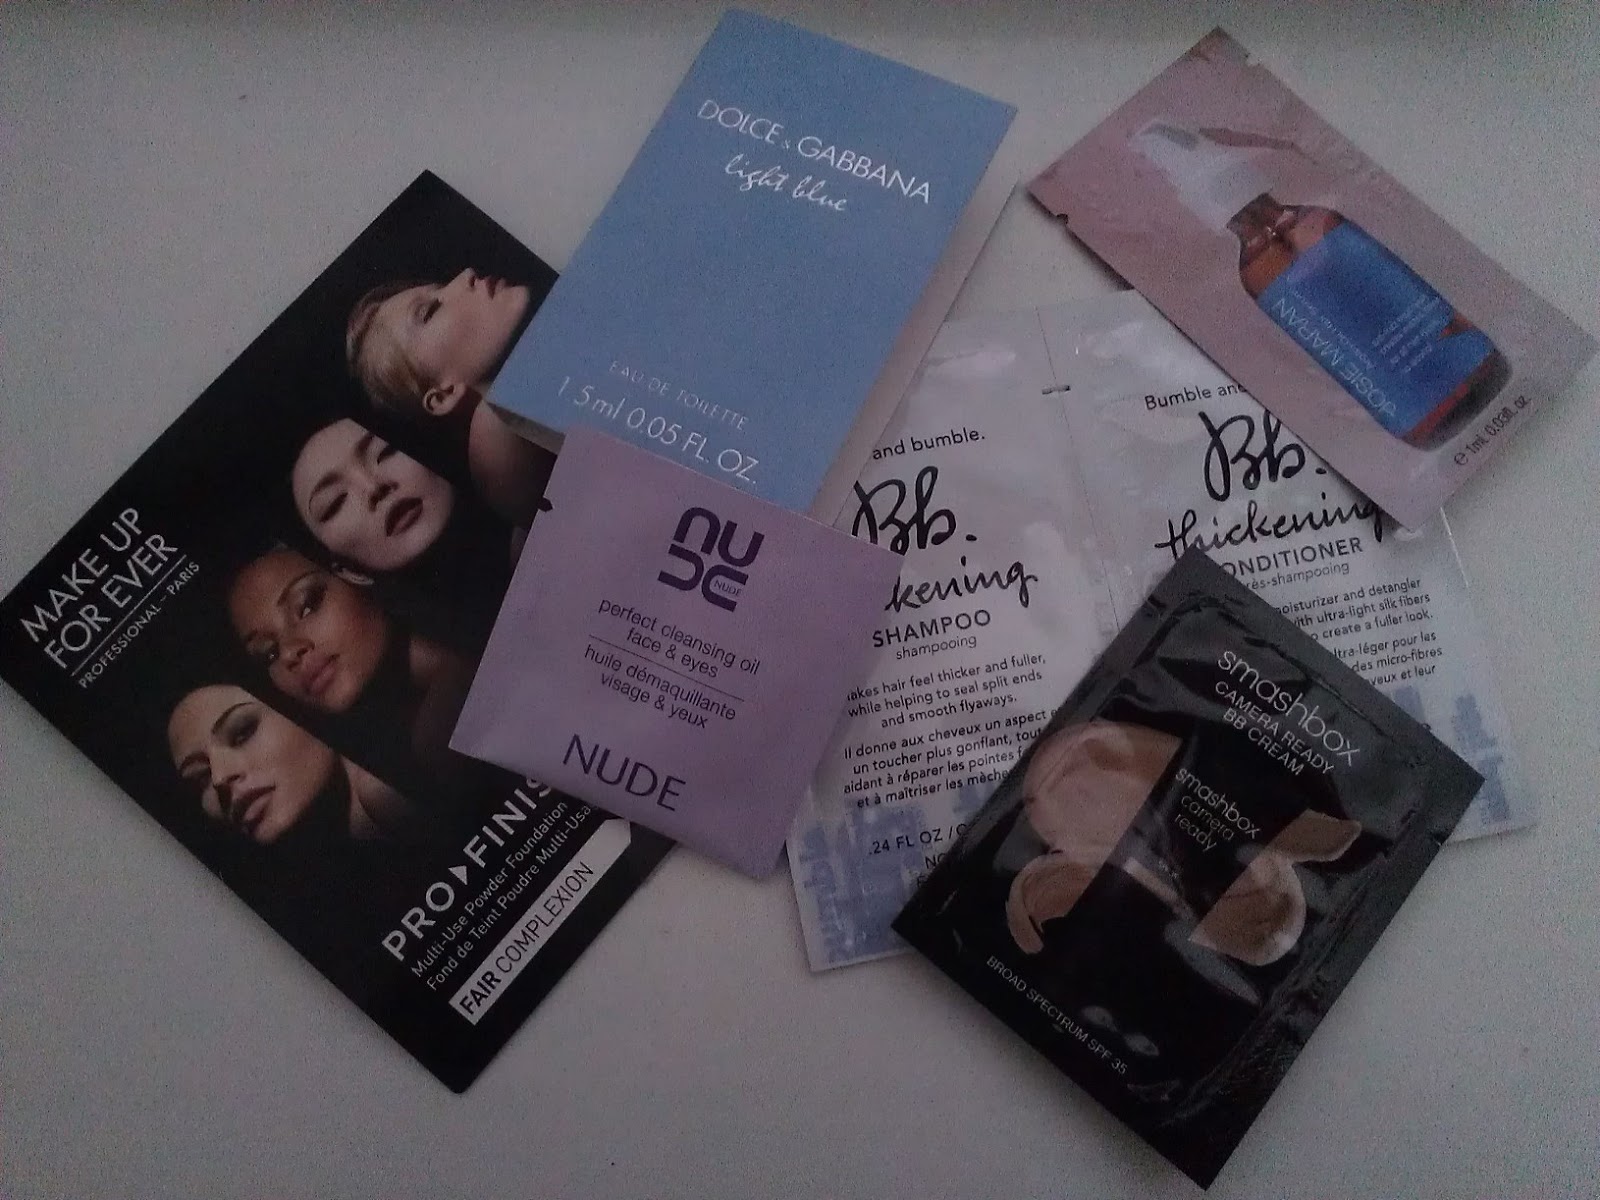
Did any of you went crazy at Sephora's Chic Week? As VIB I was able to go in earlier for the discount than regular BI and also got myself a bag of samples! :) Personally I was expecting something extravagant.. like makeup artist at almost every brand; giving out samples & doing makeovers and all that glam..but nope. Maybe I was just expecting a little too much and had nothing more than the little chat about Chic Week when I was at the cashier paying/getting my samples.


I was expecting at least one deluxe sample size but didn't. Anyhow, I'm pretty excited to try the Bumble & Bumble shampoo/conditioner along with the Josie Maran's hair serum. I blow dry my hair every night and I think having Argan oil infused into the product would help a lot!

 I had to restock 2 of my Holy Grail facial products. Ren's Cleansing Milk and Josie Maran's Argan Oil.


I started using REN's cleansing milk about 4 years ago and once I started I can't go back to other brands. I tend to have dry skin and a lot of products would make my face feel really tight and stretchy after washing. This cleansing milk leaves my face feeling fresh and clean but never that tight feeling. Holy Grail Face Wash... Checked


Josie Maran's Argan Oil is a recent addition to my HG. I heard so many good things about it and got the travel size bottle to try a few months ago. I love how it's multipurpose and I can use it on my face, cuticles and hair. What I like to do is put some facial cream onto the back of my hand and put a drop or 2 of the oil and mix it in before applying it to my face. It makes such a difference and my face gets really moisturize w/o being oily. I LOVE it and I got so many of my friends to jump on this wagon. =P

The last thing I picked up was an impulse buy. Don't you hate it when they make you stand in line by 2 rows of travel size products for you to pick up and try. EyeKo's Mascara Wardrobe caught my eyes with a mascara that came with 3 different type of brushes.


There's a brush for longer lashes, one to add curls and one for volume. It also comes with 2 brush covers so it's super handy and sanitary. So far the formula is good but I haven't got a chance to try out all 3 brushes or in combinations yet but I have high hopes that this would be a fun set for traveling~~


Let me know what you guys got with your discount and if you have any products I should try out with the discount. Only a few more days left. :)


Monday, April 8, 2013

Ulta Haul

Hellloo my beauty queens,

Just a quick post on the stuff I got at Ulta last week with the 20% off coupon that I received in my email.

I got the following items during this shopping trip:
-Ulta's Instant nail Polish Remover (Sponge form)
-Nivea's Sun-Kissed Radiant Skin Gradual Tanner and Daily Lotion
-Essie's "Mint Candy Apple"
-Revlon's ColorStay polish in topcoat
-Mario Badescu's Drying Lotion


Essie's Mint Candy Apple with Revlon ColorStay's top coat. I'm in love with this. It's the perfect pastel polish. A very nice shade of mint actually. I'm a bit obsessed with it. The pictures below doesn't do its justice. The color in the bottle comes off a bit darker than when applied on nails. I think this color is a must for Spring/Summer.


I'm kind of indifferent about the top coat right now. I like the design of the brush. It's 2 tiny brush combined into 1 giant brush. It's effortless to apply on unlike some top coat that's super thick and gooey. Still testing for the lasting power and I had it on since 4-5 days ago and there's a few chips here and there.


I didn't get a chance to try out the tanning lotion or polish remover yet. I'm hoping the lotion will get me a bit tanner before I head home to Hawaii. Thanks to Seattle, I don't have any single bits of color left in me.. :( Gonna have to go to the beach everyday in those 2 weeks I'm home!

As for the drying lotion, I think I need to review that one on another post. Way too AMAZING to not have a post on its own; so look out for that! :)

Happy Monday!! <3


Wednesday, April 3, 2013

CHIC week

Sephora is having their Chic Week from 4/11-4/22. If you are a VIB member, you most likely got something in the mail! I got mine today and this time they are offering a 15% off coupon that you can use during Chic week.

On the first day of Chic Week, Sephora will be giving out a tote bag filled with samples for you to try out this Spring! Check your local Sephora for event hours but from my understanding I think its 6-9pm. Go early because these totes are given while supplies last. So excited!! What will you buy with your discount?

Here are my top 5 picks based on this Spring trends :

1) Strong BOLD eyebrows
- Anastasia brow Powder Duo will do the job. They come in 6 different shades and each compact have 2 different colors; perfect for mixing to get the right brow color.

2) Lip Cleavage
-Now that spring is coming, it's time to put away those wine color lipsticks and put on some bright coral or baby pink lips. Yves Saint Laurent ROUGE VOLUPTÉ Silky Sensual Radiant Lipstick SPF 15 is my personal favorite. (wow that was a mouthful) Lots of colors to choose from and with its built in SPF 15, we don't need to worry about being in the sun too long and not look cute at the same time :)


3) Bronzer
-After a whole winter without sun, I think we all need some color on our face. Especially with the lack of sun in Seattle, I like to rely on my Holy Grail (HG) bronzer from Benefit- Hoola Bronzing Powder. I love the matte finish from this powder so it looks a lot more natural then the ones with glitter in it. Highly pigmented so use a soft-hand with this and you'll look so flawless with a hint of color on your face!

It also come in a value set...

4) Pastel Nails
-Spring is the start of mani/pedi season. I love pastel and bright colors for the spring. Illamasqua offers a wide range of colors. These polishes are glossy, long wear and very opaque. Don't you hate it when bright polishes have streaks and you need to put on at least 3 coats? Well Illamasqua got you covered.
 5) Sniff Sniff Sniff
-With hundreds of flowers blooming next to you, why not smell like one yourself? I'm sure your date will appreciate a fresh smelling perfume. Marc Jacobs Daisy Eau So Fresh will be your bff for this season.

This is a bit more expensive than the original Daisy but if you are a collector/ lover of perfume; this will be worth it!


Okay ladies, those are my top 5 this Spring. Let me know what your favorites are in the comments below or you can always tweet me as well! :)  Good Night!

Tuesday, April 2, 2013

DIY Nail Polish Rack

Helllooo, It's been awhile since I posted something and I hate myself for being such a slacker. Nonetheless, I'm going to try really hard to post every week. I have a lot of different contents to post and I tend to take pictures of the things I want to share with you guys but just haven't gotten around to really do so. :( Shame on me!

About a month ago, I finally found time to create my own version of a nail polish rack. My addiction to polishes got a bit out of control and the box I originally store it in ran out of room. I saw Dulce Candy's version of nail polish rack here and always wanted one of my own but in a small version. 

I stopped by Michael's and grabbed the following materials:
-5 pieces of 1/4 x 4 x 12 inch Birch Plywood board (A)
-1 piece of 1/8 x 12 x 12 inch Birch Plywood board (B)
-Brushes
-Paint of your choice ( I picked up white)
-Hot Glue Gun 
-Glue Sticks
**I originally picked up some spray paint but it didn't work well with the wind and it didn't dry as nice as I thought it would so I ended up getting real paint and brushes instead :)


Step 1: 
- Lay board B on a flat surface and take board A to use as a ruler to draw the lines in which you'll be gluing the boards down for your shelves. Starting from the top, lay board A directly on top of board B and draw a line. Then stand up board A to draw your second line. The distance between the two lines should be the width of board A. Continue this 1 more time or as many time as you need if you got bigger boards for a bigger shelf.


Step 2:
- After you finish drawing in the line, it's time to heat up your hot glue gun and prepare to glue down the shelves.  Place glue in between the lines you just drew and place board A immediately on top; hold for 30 secs. Work through all your boards for the remaining of the shelves. For the last shelf, place glue on the bottom of board B then place the edge of board A on top. (The last shelf will be slightly smaller in comparison to the other shelves since it uses part of board B for support)

Step 3: 
- Now put the remaining 2 boards on the side of your shelf using the same method as step 2. Work thru this quickly as you have to ensure that all levels of your rack gets glue on to the side of your rack.


Step 4:
-Let your rack sit for an hr and go back to add glue to places you think you might have missed during the process.

Step 5:  
-You are now ready to paint your rack with the color of your choice. You can get creative and decorate the rack with patterns or drawings. I kept mine white for simplicity and most of my furniture at home are white. After each coat, let it air dry for a good 5 min or so before going over it again. I did 2 coats on mine and then came back for one last coat the next day.

Ta--DAAAA and now you have your own nail polish rack. I think this is going to feed my addiction even more....but I enjoy looking at them and remind myself what I have so I don't buy similar colors. I'm so in love with mine and I organized my polishes by colors and brands.


I hope you guys had fun with this small DIY. I'm sure there are already a billion of other bloggers & youtubers with this DIY. Maybe this will be another push for you to get this project going this weekend b/c it was so much fun and I'm glad my polishes have a nicer home! :)

**PS. Each level fits 2 rows of polishes and even 3 rows if you want but it might get a bit crowded so I kept mine at 2.

Until next time! <3